My keg conversion project

Fri Aug 13, 2010 8:05 am

Things are progressing well and I thought I should document this.

I purchased six used kegs from a local craft brewery (thanks Joe!) and had another that was a reject from a big brewer. All had some damage, generally bent at the Barnes neck, but all still hold liquid. I got a good deal for buying the six together, and figured doing a batch conversion would make things easier and cheaper on a per keg basis, e.g. the welding shop charged me for two hours of work, where one keg wouldn't have been worth their time and they probably would have charged me for an hour.

Big pictures can be found here.

Image
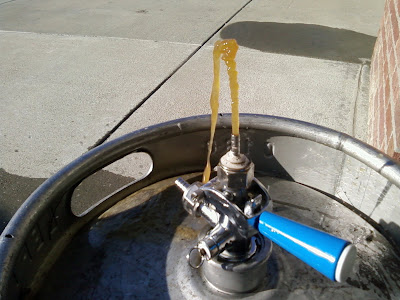
To depressurize the kegs I borrowed a commercial tap from a friend (thanks Kari!) and hooked it up to each. Some still had a bit of beer in them, as I quickly discovered. Lesson learned.

Image
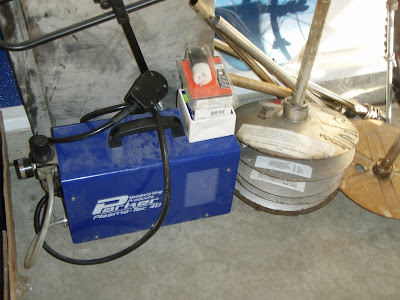
I borrowed a plasma cutter from a friend (thanks Paul!). Since I don't have a 240V line convenient, I enlisted the help of my neighbor (thanks Thomas!), who has 240V to his garage and gas all in one location.

Image
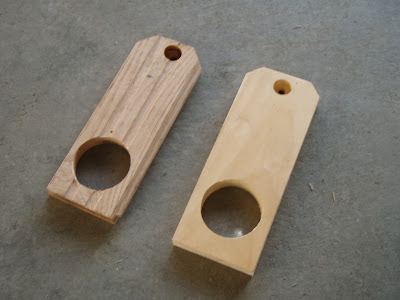
I came up with two different concepts for cutting jigs. One was two pieces of wood with a hinge to go around the curvature at the top of the keg. It turns out that one wouldn't have lasted long, but I'm getting ahead of myself. This is the other concept. One piece of wood with a hole cut out to go around the neck of the keg, and a two step hole for the tip of the plasma cutter. I first made a couple out of pine, with the holes in different locations so I could experiment to get the right diameter hole in the keg top. I wanted it big enough for a false bottom to fit through, but small enough for a commercial pot lid I can buy in town. I figured it was easier to just make a few jigs, draw lines with a pen in the jig, and measure instead of trying to do math.

Image
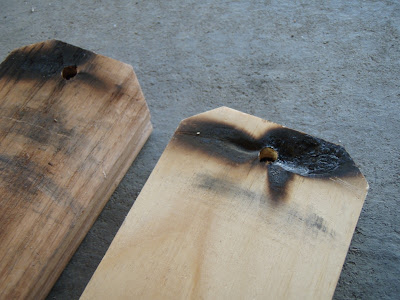
The jig worked, but out of pine the plasma burnt it up quite a bit. One or two kegs and the jig was up. So I made one out of a piece of scrap oak flooring I had. I think we cut at least three kegs with the oak jig and it could still be used for more. My other concept for a jig used 1/4" plywood. That wouldn't have lasted at all. The solid piece worked fine. If I were going to do it again, I'd probably just use the oak jig. It did occur to me that I could replace one piece of wood on the hinged jig with something like a piece of ceramic tile and that could probably be used endlessly.

We filled the kegs with water before cutting to keep the splatter from sticking to the sides. Cutting each keg took about a minute. Most of the time was spent moving the water from keg to keg.

Image
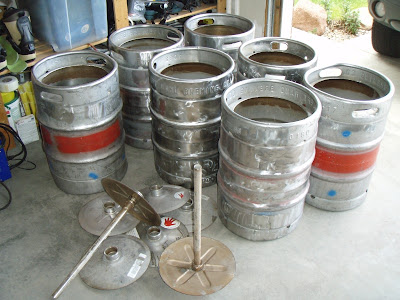
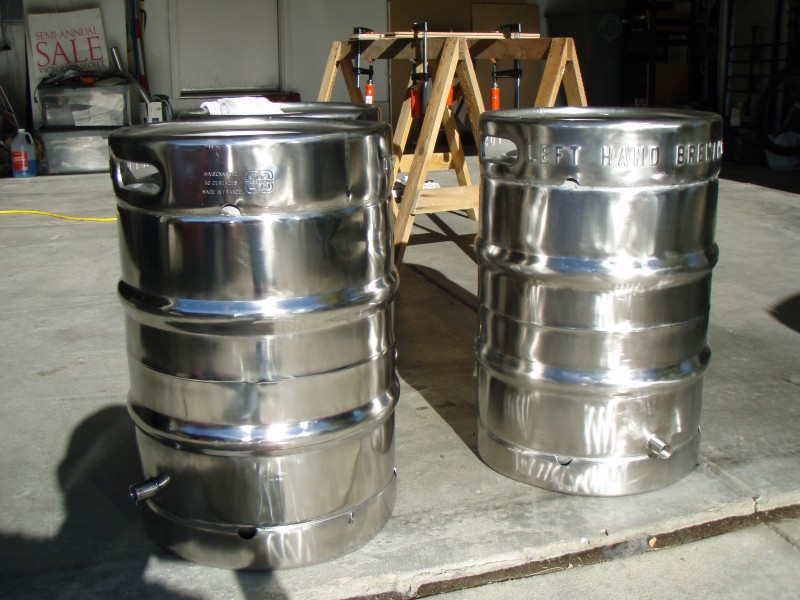
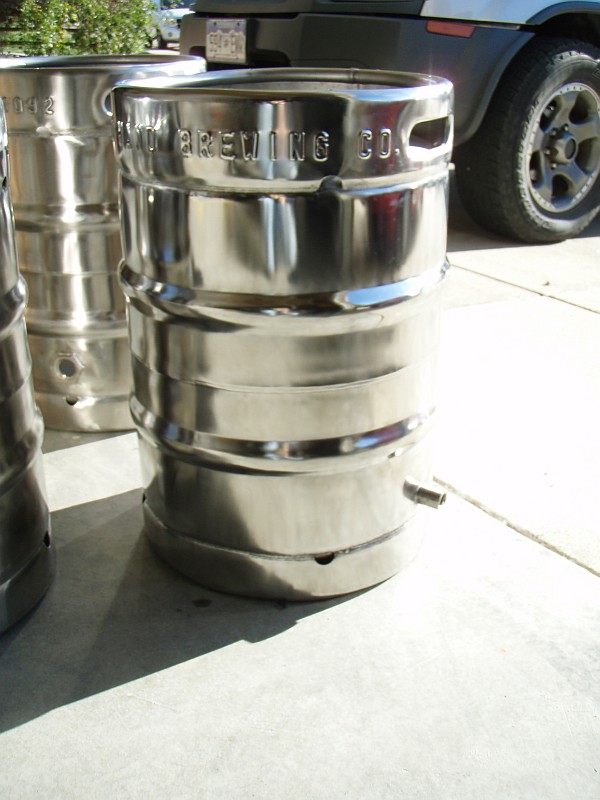
Here they all are after cutting. After this I drilled holes for all the fittings, with a step bit, and I started cleaning up the kegs. Some people have mentioned using a punch for the holes. That might work fine, but I thought the step bits worked fine too. Also, I had different sizes of holes to cut, for 1/4" inch couplings, 1/2" couplings, and a bigger for hex nuts for heating elements. I would have bought three or four different punches, adding up $.

Image
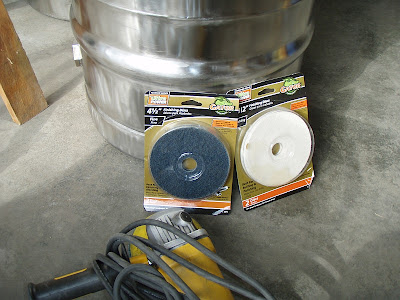
To clean the kegs I started with a coarse rust/paint/scratch removal wheel on an angle grinder. I followed up with a fine finishing pad.

Image
In this photo most of the kegs are done with the blue finishing pad. The top right keg is 2/3 done.
I've sold off a few of the kegs at this point to local homebrewers to cover my costs. For my kegs I'm going to use the cloth pad and polishing compounds to get to a high shine.

More to come ...
Aging: Gotlandsdrickå, Baltic Porter in Bourbon barrel, Olde Ale #2 in whiskey barrel
On Draft: Nothing. Building a walk-in cooler right now.
User avatar
foomench
 
Posts: 751
Joined: Fri Jun 27, 2008 7:53 pm
Location: Longmont, CO

Re: My keg conversion project

Fri Aug 13, 2010 8:56 am

Cool jig. Did you shape the bottom of the jig to accommodate the curved surface on your one-piece jigs? I like the idea of a hinged jig with a piece of drilled ceramic tile. I free-handed mine by resting the head of the plasma torch on the top skirt of the keg and wish I had made a jig first so it would be a cleaner cut.
PFC BN Army - 43rd Battalion Mashing Squadron
beltbuckle
 
Posts: 393
Joined: Thu Oct 08, 2009 6:19 am

Re: My keg conversion project

Fri Aug 13, 2010 6:13 pm

beltbuckle wrote:Cool jig. Did you shape the bottom of the jig to accommodate the curved surface on your one-piece jigs?
No. I found if I pulled away and down from the neck consistently I could get an even radius cut. The circle was big enough to fit over the top of the neck, which means it is slightly too big over the rest at a 90 degree angle. But that allows it to angle down just right.
Aging: Gotlandsdrickå, Baltic Porter in Bourbon barrel, Olde Ale #2 in whiskey barrel
On Draft: Nothing. Building a walk-in cooler right now.
User avatar
foomench
 
Posts: 751
Joined: Fri Jun 27, 2008 7:53 pm
Location: Longmont, CO

Re: My keg conversion project

Thu Aug 26, 2010 9:29 pm

Ok. I did not have a plasma cutter. However, after contemplating a "jig" attached to the center, which is most logical, I reconsidered and used a block of wood on the outside edge (indside the rim) to draw an even circle. Then I just cut it out with a grinder. Worked well and got a perfect circle.
On Deck:
Cream Ale
Fermenting:
Dusseldorf Altbier
On Tap:
Brown Porter

"I feel sorry for people who don't drink. What horribly boring lives they must lead." Micky Rourke, Barfly
Crackin
 
Posts: 273
Joined: Tue Oct 14, 2008 5:48 am

Re: My keg conversion project

Fri Aug 27, 2010 9:09 am

Very cool! Thanks for the step by step guide!
Neuron_Theory was brewed according to the Reinheitsgebot.
BN Army Corporal - 1st Minn. Lakefront Divison
Prost!
Image
User avatar
Neuron_Theory
 
Posts: 305
Joined: Wed Jun 11, 2008 1:21 pm
Location: Rochester, Minnesota

Re: My keg conversion project

Sun Aug 29, 2010 7:23 pm

Crackin wrote:Ok. I did not have a plasma cutter. However, after contemplating a "jig" attached to the center, which is most logical, I reconsidered and used a block of wood on the outside edge (indside the rim) to draw an even circle. Then I just cut it out with a grinder. Worked well and got a perfect circle.

Whatever works. Connecting to the center worked for me, and I know some people have made angle grinder jigs that attach to the neck. The disadvantage, regardless of the cutter, is that it falls away when you've cleanly cut everything away. If you're prepared, not a big deal, but I think I stray cut one when the center fell out. I considered a jig to run inside the chimb, but more of my kegs had badly bent rims than badly bent necks.
Aging: Gotlandsdrickå, Baltic Porter in Bourbon barrel, Olde Ale #2 in whiskey barrel
On Draft: Nothing. Building a walk-in cooler right now.
User avatar
foomench
 
Posts: 751
Joined: Fri Jun 27, 2008 7:53 pm
Location: Longmont, CO

Re: My keg conversion project

Mon Sep 27, 2010 7:23 am

Polished kegs this weekend. I used my angle grinder with cloth pads, started with black polishing compound, then gray, then green. I think I should have been more aggressive with the black, as I can still see faint effects of my pass with the blue pad at the bottom of the keg. And I'm not sure if the grey pass did any good. Next one I'm going to do more with the black, and try skipping the gray.

Here the left keg has been polished, the right one has not, for comparison:
Image

I'm calling this one done. It is my backup boil kettle for use with propane. My primary kettle still in the works will be electric.
Image
Aging: Gotlandsdrickå, Baltic Porter in Bourbon barrel, Olde Ale #2 in whiskey barrel
On Draft: Nothing. Building a walk-in cooler right now.
User avatar
foomench
 
Posts: 751
Joined: Fri Jun 27, 2008 7:53 pm
Location: Longmont, CO

Re: My keg conversion project

Mon Sep 27, 2010 7:37 am

Those get me sporting wood, but I don't think I would have polished them. I would have spent the time brewing. You obviously have more patience than I do. Thanks for sharing.
"Mash, I made you my bitch!" -Tasty
User avatar
Dirk McLargeHuge
Global Moderator
 
Posts: 5702
Joined: Sat Aug 11, 2007 1:43 pm
Location: Fredericksburg, Texas

Next

Return to Brewing Equipment

Who is online

Users browsing this forum: No registered users

A BIT ABOUT US

The Brewing Network is a multimedia resource for brewers and beer lovers. Since 2005, we have been the leader in craft beer entertainment and information with live beer radio, podcasts, video, events and more.